Basic HTML Version


LEXIUM
LEXIUM
82
TELE-satellite International — The World‘s Largest Digital TV Trade Magazine
— 09-10/2012
— www.TELE-satellite.com
idea of how this changes,
we changed the local coordi-
nates in the analyzer to 37°N
122°W to simulate the use of
the 5110Pro in San Francisco,
California. The list of visible
satellites for this west coast
location included everything
from 160°E to 43°W. As you
can see, the meter automati-
cally adjusts the local channel
list based on its operational
location. One thing to keep in
mind though: this visible list
of satellites represents those
satellites that can be “seen”
from your location and does
not necessarily represent
a list of those satellites that
can actually be received. Only
those satellites that have a
beam pointing in your direc-
tion can be received.
In addition to the “local
channel list” there’s also a
“user defined channel list”.
This list is customizable by
the user so that more popu-
lar satellites can be accessed
more quickly. The 5110Pro
comes shipped from the fac-
tory without any data in this
list. When setting up the “user
defined channel list”, the first
open channel is selected so
that a satellite can be set up.
So, let’s say, for example, we
wanted to add Galaxy 19 at
97°W into the user defined
list. The meter has to first be
placed into the “user defined
channel list” mode by press-
ing and holding down the Op-
tion/Local button for about
three seconds.
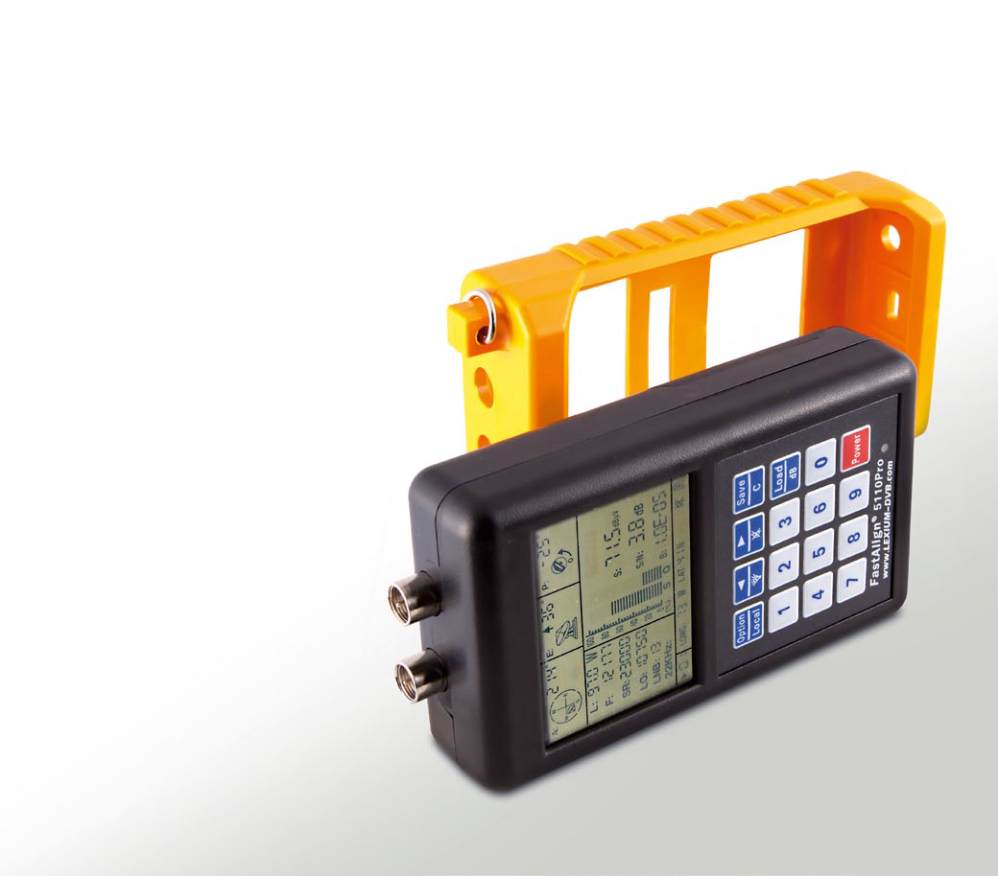
Once the meter is in the
correct mode, you can then
enter in all the relevant data
for Galaxy 19 (orbital position
(L), transponder frequency
(F), symbolrate (SR), local
oscillator frequency (LO), po-
larization (LNB) and 22 kHz
on/off). For this purpose we
chose the 12.177V GHz tran-
sponder with a symbolrate
of 23000. As soon as the en-
tered data is saved into the
meter’s memory, the correct
alignment information for the
antenna (azimuth, elevation
and polarization angle) in-
stantly appears at the top of
the display. This data tells you
exactly where to point the an-
tenna to receive that satellite.
So, with the meter in hand,
we went outside to align the
dish. Since Galaxy 19 was just
entered into the “user defined
channel list”, it makes sense to
begin by aligning our antenna
to this very popular satellite.
Keep in mind that you can use
either the “user defined chan-
nel list” or the “local channel
list” to start with since Galaxy
19 also appears in the pre-
programmed list. You’ll also
need a short piece of coax
cable to connect the meter to
the antenna’s LNB. And don’t
forget the compass so that
you know which way to turn
the antenna! As it turns out,
the 5110Pro is not compatible
with any of the DiSEqC proto-
cols so the analyzer needs to
be connected directly to the
LNB; there cannot be any DiS-
EqC switches in between the
meter and the LNB.
As luck would have it, we
had a spare 76cm offset dish
lying around so we decided
to use this antenna to align
to GALAXY 19. We installed a
standard Ku-band LNBF (LOF
= 10.750 GHz) on the dish and
connected it to the LEXIUM
5110Pro meter using a short
10-foot piece of coax cable.
The meter was turned on and
we decided to use the chan-
nel data that was just entered
into the “user-defined channel
list”. We could have also used
the preprogrammed data in
the “local channel list” (chan-
nel 38) that was associated
with the Ku-band side of GAL-
AXY 19 at 97°W. This channel
was set for 11.789 GHz, 28125
SR, LOF 10.750 GHz and LNB
13 (vertical polarization). Ei-
ther transponder would have
worked for this test.
At this point pressing any
one of the number buttons (0
to 9) activates the measure-
ment section of the meter.
The 5110Pro was set to go; all
we had to do is start moving
the antenna into roughly the
correct position. According
to the 5110Pro, the antenna
alignment settings yield an
azimuth (A) of 214°, an eleva-
tion (E) of 36° and a polariza-
tion angle (P) of -25°.
With the help of our com-
pass, we turned the antenna
in the general direction of
214° and elevated it roughly
36° above the horizon. Since
our 76cm dish was not on
a horizon-to-horizon (H-H)
mount, the LNBF had to be
rotated inside its holder so
that its horizontal and vertical
polarization levels matched
the position of the GALAXY 19
satellite. We adjusted the po-
sition of the LNBF in its mount
to reflect the -25° offset sug-
gested by the meter.
Thanks to the 5110Pro’s
built-in QuickSweep technol-
ogy you don’t have to worry
about missing the target sat-
ellite if you turn the antenna
too quickly. There is no delay
from the time the signal is re-
ceived to when it is displayed
on the meter; it reacts almost
instantly. This lets you move
the antenna much faster than
you might otherwise be able
to if you were using a differ-
ent meter. It’s a time saving
feature that helps to speed up
the alignment process.
So, with the meter con-
nected to our 76cm dish
and turned on, we rotated
the antenna towards 214°
while keeping an eye on the
5110Pro. The analyzer also
has an audible tone that
changes pitch with the signal
level. This lets you take your
eyes off the meter and listen
to changes in signal level if for
any reason the display is out
of your view.
As soon as we approached
the 214° position as dictated
by the 5110Pro, the signal
quality bar graph on the dis-
play (Q) began to instantly
react. We had found GALAXY
19 on the very first pass! As
we continued to move the an-
tenna the signal quality (Q)
bar graph continued to in-
crease and the “Locked” indi-
cator on the display illuminat-
ed. We continued to move the
antenna until we reached a
maximum point. We then fine